Last night and this morning's bread was a foccaccia made from Peter Reinhart's pain a l'Ancienne:
I made the dough last night, replacing about 20% of the four with King Arthur's white white whole wheat (a entirely whole wheat flour that's lighter in color and flavor because of the kind of wheat used). I used King Arthur bread flour for the rest. It's an extremely wet dough; the water weight is fully 80% of the weight of the flour.
The dough is made with ice-cold water and then put in the fridge to ferment immediately after kneading. The cold temperatures delay the yeast, so some of the other enzymes get to go to work before the yeast kills them off, enhancing the flavor of the bread.
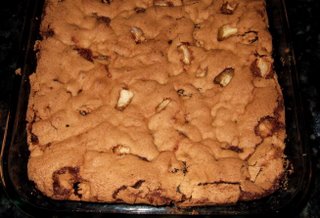
I poured the dough into a half-sheet pan and pressed it gently into the corners, spreading it liberally with oregano olive oil. (I had pooled some on the bottom of the pan first, so it's olive oil-y all over). It baked at 450 for about 17 minutes, and came out a lovely golden brown.
It's got fairly large, even holes, an almost chewy texture, and a lot of flavor. I'm going to have to try baguettes from this same some time soon.
Sunday, March 30, 2008
Saturday, March 29, 2008
Pane Siciliano: "the best bread I ever tasted"
I just got Peter Reinhart's book The Bread Baker's Apprentice and intend to make many of his breads over the next few weeks. It's slightly unfortunate timing, since it'll be Passover in a month and then summer in a few more weeks (I'll wait, impatiently, until fall to put up a sourdough starter), but that just means I need to make as much bread as possible each weekend.
My first loaf was the pane siciliano, made with semolina flour. The nine-year-old promptly dubbed it "the best bread I've even tasted;" he'll be getting sandwiches made from the batard loaf this week. I'm going to try adding some whole grain flour to the recipe in the future.
I made a triple batch of his pate fermente, an "old dough" which you put up and ferment (rise) in advance and then add to your bread to give it more flavor, on Thursday. One pound went into this bread; the other two are frozen for future use. The bread dough is made with the pre-ferment, high-gluten bread flour, semolina flour -- the nubby kind you make pasta out of -- a little honey and olive oil, salt, yeast and water. I kneaded, fermented, and shaped on Friday. It was an extremely flexible dough, stretching out like a baguette with no springing back at all. It went into the fridge overnight to proof. (I was out of sesame seeds, and the nine year old doesn't like them anyhow.)
I baked it this morning in a very steamy oven. (I preheated the oven to 550 degrees, with a cast iron skillet on the floor. I poured in simmering water and closed the door quickly, twice. The oven was incredibly steamy, despite no additional misting of water). When the bread went in, I turned the heat down to 450. After 15 minutes, I separated the breads, because they were touching; ten minutes later, they were done (205+ on the thermometer.)
Unanimous verdict? Yum.
For next time:
- Try replacing about a third of the flour in the pre-ferment with King Arthur white whole whole wheat.
- The batard loaf is a little small for sandwiches; try one large batard and one sprial next time. It also should probably be slashed; it split some on the side.
- After 15 minutes in the oven, take the bread off the pan entirely and put them directly on the rack. The middle load stayed white and soft on the sides because they didn't get enough direct heat.
Labels:
BBA,
bread,
pane siciliano,
Peter Reinhart,
semolina
Monday, October 16, 2006
Challah
I try to make challah for shabbat or twice a month (when it's not too hot and muggy out to even think about turning on the oven); it's certainly the bread I make the most frequently. I've tried a lot of different recipes; just about the only thing they have in common is eggs. One says the dough should be very wet, another that it should be very dry. Bake at a fairly high heat, or a low one. Use bread flour, or all-purpose flour. Here's the recipe that I'm happiest with, based on one from an old Fine Cooking article:
2 tsp yeast
3 1/2 cups all purpose flour (I use King Arthur, which is fairly high gluten)
1/4 cup warm water
3 large eggs
1/4 cup vegetable oil
3 tbsp honey
1/2 tbsp salt
Optional egg wash:
1 egg
2 tbsp water
Combine the yeast, water, and 1/2 cup flour in your mixer bowl, and let it sit for half an hour. Add the eggs, oil, and honey, and stir until it is combined; it'll be lumpy at this point. Our in the rest of the flour, and the salt, and mix (with the paddle, if you're using a Kitchen Aid mixer) until all the ingredients are well combined. Switch to the dough hook, and kneed for about 2 minutes (or kneed by hand). This is a fairly dry dough; it shouldn't be very sticky. Add a bit more flour if it is.
Put in an oiled bowl, and let it rise for about two hours. It can go for as much as four hours with no problem, or as little as one hour if your kitchen is warm and you're in a hurry, or rise overnight in the fridge. Shape the braid. I divide the dough into six pieces, and let them rest for five minutes or so. Using a rolling pin, roll each one out to a long thin rectangle (maybe 4" by 10"). I do this on a Silpat, so I don't need to add very much flour at all to keep it from sticking. Roll the rectangle up into a long thin rope, tapering it slightly at each end.
Line a cookie tray with parchment paper (or the silpat). On the cookie tray, braid the six strands, either into two small challahs or one large one. Here are instructions for a six-strand braid; there's a You-tube video here that shows someone making the same braid, although with slightly different directions (the braiding starts about 2 inutes into the 6 minute video).
Now cover the challah with a kitchen towel, and let it proof for another 2 hours or so. (You can cut this short if you need to.) About 15 minutes before you're ready to bake it, preheat the over to 325 (yes, it's a very cool temp. for bread baking). Beat the remaining egg and water, and brush the egg wash over the challah; you could sprinkle sesame or poppy seeds on it now. Bake for about 25 - 30 minutes.
Monday, September 25, 2006
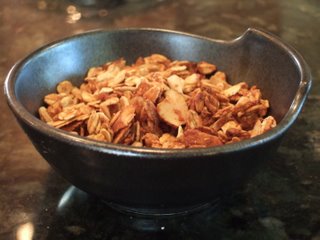
Granola
Now that it's fall, it's time to return to keeping home made granola in the house for breakfast. Granola's fun to play with, because you can adjust the recipe as much as you want, and add just about anything. It's not like baking cookies, where the amount of sugar is going to affect the texture as well as the sweetness. It may affect how clumpy or loose it is; mine is not very sweet, and tends to the looser side. I've made it enough that we have a house standard; I'll play around with the seasonings, but I like the balance of the main ingredients.
I've seen recipes with three times this much sweetener; maple syrup is another option. You can use far more butter, or leave it out entirely. Obviously, the nuts and seeds are a matter of personal preference; I'm going to try sesame seeds and ginger one of these days. If you want dried fruit in your granola, you add it after baking; I prefer to add mine to my bowl each morning.
4 cups rolled oats
1/2 cup whole wheat flour
1 cup sliced almonds
1/2 cup sunflower seeds
2 tsp cinnamon
A generous grating of fresh nutmeg (maybe 1/2 teaspoon?) or a tablespoon of fresh grated ginger
1/2 cup apple cider or juice
3 tbsp brown sugar
3 tbsp honey
2 tbsp butter
Preheat the over to 300.
Coming the oats, flour, nuts, seeds, and dry spices in a large bowl. Heat up the juice in a small pan with the optional ginger, sugar, honey and butter until the butter melts. Pour the liquid into the bowl, and stir until everything is combined. Spread it out on two jelly-roll pans. Bake, stirring every 10 minutes and rotating the pans in the over for 30 to 40 minutes. It will start to smell toasty when it is done; the granola will be starting to brown, but not yet be crispy. It'll get crunchy as it cools.
Keeps for a week or two in and air-tight container.
Saturday, September 23, 2006
Apple cake follow-up
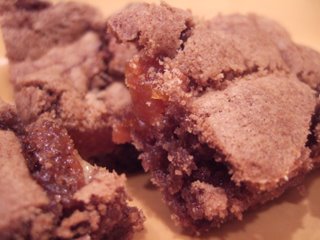
I made a second apple cake, this time half with browned butter and half with oil (and with dried apricots instead of the cherries). The batter's thick enough that the two halves didn't run together in the pan. The fat did have some effect the texture; the buttery part was chewier, the oil side a bit lighter. The flavor difference was much more significant. Browned butter is not a common ingredient, and it gives that side of the cake an intriguing dark, nutty taste which is different from the typical cake and muffin flavors. The oil side is simpler, and much more as expected. I like the extra flavor from the butter, and will make the cake that way in the future.
Thursday, September 21, 2006
Apple Cake
I've got a short list of desserts that can be put together in the time it takes the oven to pre-heat, get no more than a couple of bowls dirty, and are still worth the calories. They're the ones I turn to an hour before we have to leave for our weekly potluck dinner, or when we're having friends over for dinner on a weekday and I haven't set aside extra time for puttering; the ones that I've made often enough that I barely need to read the recipe any more.
Emily Luchetti's cookbook A Passion for Desserts has a nice sounding simple apple cake, with the apple mixed into the batter, which looked like it could be a new such recipe. I have several of her cookbooks, and trust her desserts to work. My one quibble with this one is that it calls for vegetable oil. I usually skip over oil-based cake recipes; I'd rather get flavor from my fat calories. I've made a few things with browned butter recently, and really like the complex nutty flavor it adds, so I decided to use it instead of the oil. (I probably shouldn't do this without making the cake straight once, but hey, what are friends for if not to experiment on?) She also calls for golden raisins, which I replaced with dried sour cherries, and walnuts, which I left out.
Then I've got my Penzey's cinnamon. Sure, fresh spices are always better than old ones, and Penzey's generally has good-quality spices, but it's their cinnamon that made a convert of me. You know what cinnamon tastes like, right? It's that sweet spicy brown stuff. Well, supermarket cinnamon is to their China Cassia as "natural lemon flavor" is to real lemon. It's got overtones and afternotes and all sorts of interesting things going on. If you bake at all, try some.
The cake had an unusual texture. The inside was fairly moist and dense, and the top formed an almost crispy crust. I liked it, but it was nothing like the typical more muffin-like cake. I don't know how much that's due to the substitution of butter for oil; I'll probably try it again with oil to compare. It was pretty sweet, which I expected from a recipe that calls for as much sugar as flour; next time, I'll make sure to use tart apples. Emily Luchetti serves it with whipped cream or vanilla ice cream, which would balance the sweetness nicely; this isn't an apple dessert to serve with caramel sauce. The sour cherries worked; dried apricots would as well, and it would probably be great with cranberries. It's definitely worth making again, particularly given how easy it is.
1/2 cup (one stick) butter
3 small apples, peeled and cup into 1/2 inch chunks
2 eggs
2 cups sugar
2 tsp cinnamon
2 cups flour
2 tsp baking soda
1 tsp salt
1 cup dried sour cherries
Preheat over to 350. Line a 9 by 13 inch pan with parchment paper.
Melt the butter in a saucepan over medium heat. Let it continue to cook until the solids start to brown. Set aside to cool
Whisk the eggs with the sugar in a large bowl. Add the cinnamon, apples, and cooled butter. (The original recipe added 1/2 cup walnuts at this point.) Sift the flour, baking soda, and salt together, and then stir in with the rest of the ingredients. Stir in the cherries.
The batter is pretty thick; press it into the pan, spreading it out. Bake for about 45 minutes, until a toothpick comes out clean, or with a few moist crumbs.
Wednesday, September 20, 2006
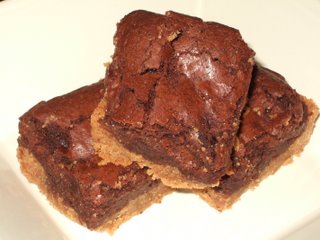
Peanut Butter Brownies
I was originally planning on making apple cake, because it's finally apple season. But it was warmer yesterday than I expected it to be, so I didn't really want to leave the oven on for most of an hour. I've been intending to make peanut butter cookies, and had peanut butter in the house, but the only recipe I liked called for nuts as well as peanut butter, and I didn't have any. But Tish Boyle's Good Cookie does have a nice sounding peanut butter brownie recipe, though the brownie part doesn't sound as good as my usual (from Alice Medrich's Bittersweet). So I put the bits and pieces together from a few sources, replacing some of the white sugar with brown because it seemed that the nuts would go well with the darker sugar flavor, and they were pretty much exactly what I wanted. They're surprisingly richer than the plain brownies; one is plenty for dessert, and two left me too full for more. (And yes, they bake for 45 minutes — although at a low temperature — so I could have just made my apple cake. Next time...)
Peanut Butter Brownies
makes 16 brownies
Peanut butter layer:
1 cup smooth peanut butter
1/3 cup white sugar
1 egg
(1/2 tsp salt because we use Trader Joe's unsalted peanut butter)
Brownie layer:
6 1/2 oz 70% chocolate
7 tbsp butter
1/3 cup brown sugar
2/3 cup sugar
2 eggs
1 tsp vanilla
1/2 cup flour
Line a 8" square pan with aluminum foil, and preheat the oven to 325. (I usually bake brownies at a higher temp, but I didn't want to overcook the peanut butter layer.)
Mix the peanut butter, sugar, and egg in a power mixer on medium speed until combined. Press into the bottom of the pan.
Melt the chocolate and the butter in a bowl in the microwave (50% power for 2 minutes, repeat for another minute if there are large chunks, stir until melted). Stir in the sugar. Add eggs one at a time, mixing until combined. Add the vanilla, and stir again. Add the flour, and stir until the edges start to pull away from the bowl (about one minute). Spread the brownie mix over the peanut butter base, and bake for about 45 minutes, until a toothpick comes out mostly clean.
Subscribe to:
Posts (Atom)